
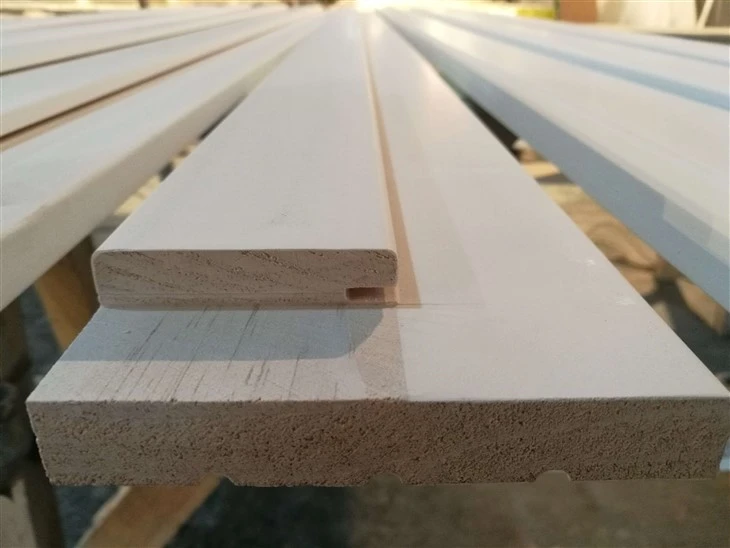

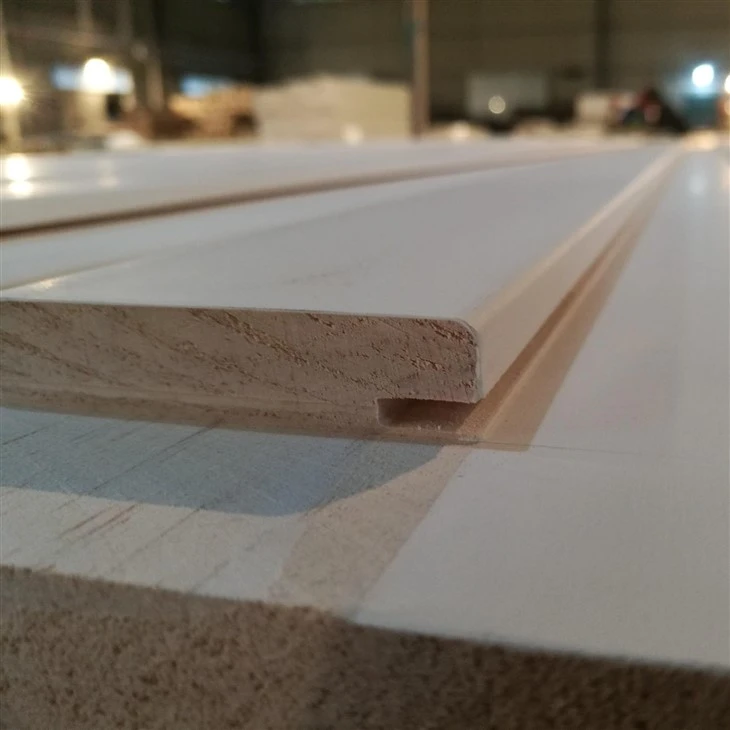
Timber Exterior Door Jamb For Entrance Door
Product name:Timber Exterior Door Jamb for Entrance door
Material:Radiata Pine,Chinese Fir,LVL,MDF
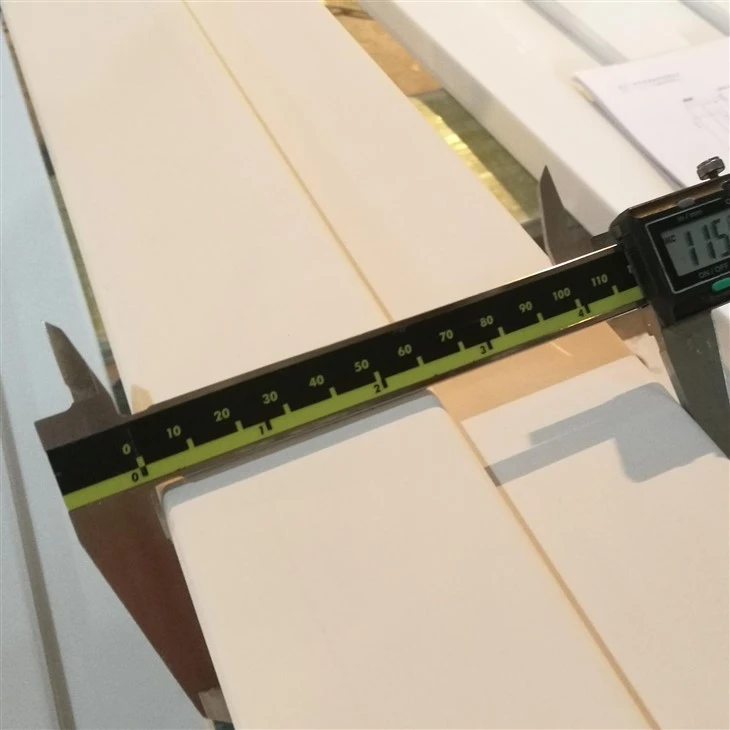
Size:1-1/4''x4-9/16'', 11/16''x4-9/16'' or Customized
Tolerance:Width: ±0.3mm, Thickness: ±0.3mm
Length:8ft, 12ft, 16ft or Customized
Moisture content:8-12%
Surface treatment:Two coat white primer + waterbase paint
Description
Products Description
Here are the steps to properly install door jamb moulding:
1. Preparation
Measure the Door Jamb: Use a tape measure to accurately measure the length of each side of the door jamb. Add a few inches to the measurement to account for any cutting errors or adjustments. This will ensure that you have enough moulding material.
Select the Moulding: Choose the appropriate type of door jamb moulding based on your aesthetic preferences and the style of the room. Consider factors such as the material (wood, MDF, PVC), the profile (design), and the width and thickness of the moulding. Make sure the moulding is of good quality and free from defects.
Gather Tools: You will need a miter saw for making accurate angled cuts, a coping saw (if you plan to use the coping method for corners), a hammer, finish nails, a nail set, wood glue, a level, and a utility knife.
2. Cutting the Moulding
Miter Cuts for Corners: For the corners of the door jamb, you will need to make miter cuts. Set the miter saw to a 45 - degree angle. Cut one end of a piece of moulding at a 45 - degree angle so that it will fit snugly into the corner. Measure and cut the other end of the same piece to the appropriate length to fit along the side of the door jamb. Repeat this process for the other sides of the door jamb, making sure that the miter cuts are in the correct orientation to form a neat corner.
Coping Cuts (Optional): An alternative to mitered corners is to use coping cuts. Cut the end of one piece of moulding square where it meets the corner. Then, use a coping saw to cut a profile on the other piece that matches the shape of the square - cut end. This method can provide a more seamless look at the corners, especially for more complex moulding profiles.
Test - fitting: Before nailing the moulding in place, do a test - fit around the door jamb. Make any necessary adjustments to the cuts to ensure a proper fit. The moulding should lie flat against the jamb and the wall without any gaps or overlaps.
3. Installation
Apply Glue: Put a thin, even layer of wood glue along the back of the moulding. This will help to hold the moulding in place and provide additional stability.
Nail the Moulding: Starting at one end of the door jamb, use finish nails to attach the moulding. Space the nails about every 12 - 16 inches along the length of the moulding. Drive the nails at a slight angle so that they go through the moulding and into the door jamb. Use a nail set to countersink the nails slightly below the surface of the moulding so that you can fill the holes later.
Use a Level: As you install the moulding, use a level to ensure that it is straight. This is especially important for the long sides of the door jamb. Make any adjustments by gently tapping the moulding with a hammer or a rubber mallet.
Installing Around the Door Hinge and Lock Areas: Be careful when installing the moulding around the areas where the door hinges and lock are located. You may need to make notches or cut - outs in the moulding to fit around these components. Make sure that the moulding does not interfere with the operation of the door.
4. Finishing
Fill Nail Holes: Once the moulding is installed, fill the nail holes with a wood filler that matches the color of the moulding. Let the filler dry completely and then sand it smooth to blend with the surrounding surface.
Paint or Stain: Depending on the material of the moulding and your desired finish, you can paint or stain the moulding. If it's wood, you may want to apply a primer first to ensure good adhesion of the paint. Apply multiple coats of paint or stain, allowing each coat to dry thoroughly, to achieve a smooth and durable finish.

| Product Name: | Timber Exterior Door Jamb for Entrance door |
| Material: | Radiata Pine, Chinese Fir, LVL, MDF |
| Size: | 1-1/4''x4-9/16'', 11/16''x4-9/16'' or Customized |
| Demesion Tolerance: | Width: ±0.3mm, Thickness: ±0.3mm |
| Length: | 8ft, 12ft, 16ft or Customized |
| Moisture Content: | 8%-12% |
| Surface Treatment: | Two coat white primer + waterbase paint |
| Quality control: | no pith, no permitted machine marks, no fibre tear or skip-dressing, no raise grain, but must be smooth and sanding finished onall four faces. |
| Delivery date: | 25-30 days after receipt of you down payment. |
| Payment: | T/T, L/C, West Union, etc. |
| Transportation: | By sea |
| Packing: | Shrinkable PVC film + Plywood Pallet |
| Visit our official website for more details about product and company: | |
| https://www.alibaba.com/product-detail/Hot-Sale-White-Gesso-Double-Rabbet_1601294019816.html?spm=a2747.product_manager.0.0.4f7671d22UIRJo | |


Production Process


Products Inspection

Product Packaging

Company Profile


Production Workshop


Hot Tags: timber exterior door jamb for entrance door, China, manufacturers, suppliers, factory, wholesale, mill, decorative wood wall trim, upvc window boards bullnose, wood countertop edge moulding, timber mouldings near me, solid wood moldings, dentil moulding wood


